Tredit Limited Warranty
Updated January 1, 2021. This Limited Warranty is for all Tredit tire and wheel brands and applies to Tredit’s trailer tires and wheels purchased as original equipment or through authorized Tredit retailer. Subject to the terms and conditions below, the original consumer purchaser (“purchaser” or “you”) is entitled to the benefits of this Limited Warranty unless (1) a warranty exclusion applies, (2) the purchaser has failed to comply with this Limited Warranty’s use, maintenance, safety, or tire rotation requirements, or (3) the purchaser has failed to comply with any other term or condition of this Limited Warranty.
This Limited Warranty does not cover tires and wheels from brands or manufacturers other than Tredit (including but not limited to Goodyear, TBC, and Michelin), and Tredit makes no warranty, whether express or implied, for those tires and/or wheels for their first five (5) years in service. At Tredit’s sole discretion, select brands may carry a 6th year of warranty coverage administered by Tredit Tire and Wheel. Any warranty, if applicable, for first five (5) years of service for those tires and/or wheels will come from the manufacturer or supplier of those products. Below are referenced websites that will give you more information about the applicable warranty for Goodyear, TBC, and Michelin branded tires:
Important Definitions
Useable Tread Life is a tire’s original tread groove depth down to the treadwear safety indicator bars that are molded into the tire groove. The treadwear indicators are reached when only 2/32nds of an inch (1.6 millimeters) of tire tread remains. A tire has delivered its full Useable Tread Life when its original new tire tread has become worn down to the treadwear indicators at 2/32nds of an inch (1.6 millimeters) of tread remaining. Tires become unsafe for use and must be replaced to avoid accident or injury when the tread depth remaining is 2/32nds of an inch or less.
Comparable Tire is either the same line of tire or, if the same tire is unavailable, a tire of the same basic or equal construction and quality with different sidewall or treadwear configuration may be substituted.
Comparable Wheel is either the same line of wheel or, if the same wheel is unavailable, a wheel of the same basic or equal construction and quality with different design or color configuration may be substituted.
Ride Disturbance is when a newly purchased Tredit tire, within one year from the date of purchase by the purchaser, does not deliver a satisfactory ride or displays an unsatisfactory road handling characteristic that is attributable solely to the tire. Tredit, in its sole discretion, will determine whether a Ride Disturbance has occurred. Ride Disturbance does not include a ride disturbance not solely caused by a new Tredit tire, such as disturbances caused by mechanical issues, improper axle alignment, hub issues, and brakes. Normally, Ride
Disturbance should not be present when tires are properly mounted and balanced, and never occurs on all tires. “Cannot balance” or “Out of Round” does not constitute a Ride Disturbance. Claims for Ride Disturbance under this Limited Warranty will not be honored after the first 2/32nds of an inch of Useable Tread wear has occurred or over one year from date of purchase.
Structural Failure is a pinhole leak, a nonconforming weld, or a crack not due to overloading, under or over-inflation, impact, accident, vandalism, or other factors not related to the manufacturing process.
Tire Allowance is a prorated discount on a new Comparable Tire calculated by dividing the number of 32nds of Useable Tread Life remaining on the tire for which the purchaser is seeking a Tire Allowance (rounding to the nearest 32nd of an inch) by the total number of 32nds of an inch of Useable Tread Life. For example, if 60% of the original tread depth remains on the adjusted tire, you will be entitled to a 60% discount from the retail price of Comparable Tire. If tread depth cannot be determined, Tredit will determine the tire allowance. Tire Allowance is determined by Tredit in its sole discretion.
Weather Checking is ozone and UV exposure to a tire that causes degradation of the rubber. Whether weather checking on a particular tire has occurred will be determined by Tredit, in its sole discretion, after examining the tire.
Wheel Allowance is a prorated discount on the price of a Comparable Wheel from Tredit that accounts for the purchaser’s use of the wheel for which purchaser is seeking a Wheel Allowance. Wheel Allowance will be determined by Tredit, in its sole discretion, after examining the requested adjustment.
Warranty Period is as follows:
- For Tredit tires,
- for Issues not relating to Weather Checking, whichever comes first: (i) the life of the original tread; or (ii) the following amount of time from the date of purchase:
- Six years (all Tredit radial brands),
- Sixth year coverage (all other non-Tredit radial tire brands with 5-year manufacturer coverage), or
- Two years (all Tredit bias tire brands); or
- for Issues relating to Weather Checking, whichever comes first: (i) the life of the original tread; or (ii) two years from the date of purchase.
- For Tredit steel and aluminum wheels,
- the term of the original purchaser’s ownership for Issues causing a Structural Failure;
- One year from the date of purchase for Issues relating to corrosion or paint;
Issue means the failure of the materials or workmanship to conform with Tredit’s design and manufacturing specifications for the tires or wheels. Tredit, in its sole discretion, will determine whether an Issue exists with a particular tire or wheel.
Who is Eligible to Take Advantage of This Limited Warranty
To be eligible to take advantage of this Limited Warranty, you must be the original purchaser of a new warranted Tredit tire and/or wheel and the tire or wheel must have been continuously installed on the vehicle on which it was first installed; spare assemblies mounted to the unit are covered under this provision. Your sales receipt from the Tredit tires or wheels or from the towable unit you purchased (if the towable unit included Tredit tires or wheels) is your proof of purchase and determines the date of purchase of the tires or wheels and the vehicle upon which the tires or wheels were originally installed. If you cannot provide a proof of purchase, the date of purchase will be the date of manufacture. For tires, the date of manufacture is determined by the Department of Transportation’s prescribed tire identification code located on the sidewall of the tire. For wheels, the date of manufacture is determined by the Department of Transportation’s prescribed wheel identification code stamped in the wheel lip or spoke.
This Limited Warranty is not transferable to another person or entity. By purchasing Tredit products or seeking benefits under this Limited Warranty, you agree to be bound by the terms of this Limited Warranty, including the warranty exclusions, the disclaimer of liability and limitation of remedy, the limitation and disclaimer of implied warranties, and the choice-of-law and choice-of-forum provisions.
What This Limited Warranty Covers
For Tredit tires, this Limited Warranty covers only: (i) Ride Disturbances and (ii) Issues in the tires existing at the time the tires are delivered to the purchaser. For Tredit wheels, this Limited Warranty covers only: (i) structural failures due to Issues in the wheel existing at the time that the wheel is delivered to the purchaser for the term of the original purchaser’s ownership; (ii) corrosion Issues (oxidation or pealing not resulting from ordinary wear and tear) existing at the time that the wheel is delivered to the purchaser up to one-year of service from date of purchase; and (iii) Issues in cosmetic paint/clearcoat (pealing, flaking, or oxidation not resulting from ordinary wear and tear) existing at the time the wheel is delivered to the purchaser up to one-year of service from date of purchase.
All Issues must be brought to Tredit’s attention in writing by the purchaser during the Warranty Period and within 30 days of the purchaser discovering the Issue for the Issue to be covered by this Limited Warranty.
This Limited Warranty does not extend to the future performance of Tredit tires and wheels.
What Tredit Will Do
For Issues covered by this Limited Warranty and properly brought to Tredit’s attention in writing during the Warranty Period and within 30 days of purchaser discovering the Issue, Tredit offers the following exclusive remedy to the original purchaser (“Exclusive Remedy”):
1. No-charge warranty replacement. Provided purchaser has complied with the other terms of this Limited Warranty, Tredit will provide, at no charge for the purchaser, a Comparable Tire and/or Comparable Wheel plus mounting and balancing of that assembly, if:
- An Issue or Ride Disturbance on a tire covered by this Limited Warranty manifests itself during the first 2/32nds of an inch of wear of the Useable Tread Life within the first year from date of purchase;
- An Issue in structure on the wheel(s) covered by this Limited Warranty manifests itself during the term of the original purchaser’s ownership; or
- An Issue in paint/clearcoat with wheel(s) is covered by this Limited Warranty manifests itself within the first year after the date of purchase.
2. Purchase price allowance. If you do not qualify for a no-charge replacement, provided that you have complied with the other terms of this Limited Warranty, at Tredit’s discretion, Tredit will provide you with a Tire Allowance or Wheel Allowance towards the purchase price of a Comparable Tire or Comparable Wheel in Tredit’s then current inventory. Purchaser will be responsible for the charges applicable for mounting, balancing, and taxes for the Comparable Tire or Comparable Wheel.
When Coverage Ends
Once the Useable Tread Life of a Tredit tire has been exhausted or the Warranty Period has ended (whichever comes first), the benefits of the Limited Warranty terminate. Any repairs or replacements Tredit provides or pays for beyond what this Limited Warranty requires will be considered “goodwill” repairs. By providing such goodwill repairs, Tredit in no way waives or intends to waive the remedy limitations and disclaimer of consequential and incidental damages set forth in this Limited Warranty.
Warranty Exclusions
This Limited Warranty does not cover:
• tires and wheels installed on a vehicle registered or normally used outside the United States or Canada;
• tires and wheels transferred to a vehicle other than the vehicle on which the tire or wheel was originally installed;
• tires and wheels on which the molded DOT number has been removed or disfigured;
• tires or wheels that have been damaged due to abuse, neglect, or misuse;
• tires or wheels that have been altered in any way, including but not limited to changing the tire’s or wheel’s appearance;
• tires that have been repaired in a manner that does not comply with U.S. Tire Manufacturers Association standards;
• wheels that have been repaired in any manner;
• wheels mounted on vehicles that have improperly inflated tires;
• wheels that have been fitted to the incorrect hub;
• wheels that have improperly torqued and/or lack of re-checking torque with good working order torque wrench;
• tires that have been fitted to the incorrect wheel;
• ordinary wear and tear on tires and wheels;
• tires and wheels that have been installed on a vehicle (i) for which the tire or wheel was not specifically intended; (ii) that has been overloaded; (iii) that has been used off-road or for racing; or (iv) that is driven at speeds in excess of the tires designed speed rating;
• tires and wheels that have been damaged due to running flat, road hazards, potholes, chuckholes, construction, excavations, or collision damage, improper mounting or balancing, vandalism, theft, racing, off-road use, long-term improper storage, cuts, snags, carcass bruises, or other abuse;
• tires that have been over- or underinflated, overloaded, or for which the purchaser has failed to maintain proper tire pressure;
• tires and wheels on or in which has been used or applied (i) puncture sealants, tire plugs, or fillers; (ii) added liquids, solids, or gases (other than air, nitrogen and carbon dioxide);
• tires and wheels on which there are ozone or weather cracks or checking occurring two years after the date of purchase or, if that proof of purchase is not available, two years after the DOT serial date;
• tires and wheels damaged by vehicle mechanical failures, improper alignment, brake and shock failure, or improperly aligned tires;
• tires with irregular treadwear, such as where there is a tread depth difference of 2/32nds of an inch or more across the tread surface on the same tire;
• tires when the wheel on which the tire is mounted is removed from service or fails; and
• tires whose tread design has been altered, including to change their appearance or to improve traction (e.g., siping) or grinding to improve uniformity, or sidewall (e.g. color inlays).
Misusing a Tredit tire or wheel, altering a Tredit tire or wheel (beyond ordinary wear and tear), transferring a Tredit tire or wheel to a vehicle other than the vehicle on which the tire or wheel was originally installed, or damaging a Tredit tire or wheel VOIDS this Limited Warranty with respect to such tire or wheel and discharges Tredit’s obligations under this Limited Warranty.
Limitation and Disclaimer of Implied Warranties
This Limited Warranty is the only warranty, whether express or implied, that accompanies the sale of Tredit tires and wheels. TREDIT MAKES NO WARRANTIES TO YOU, WHETHER EXPRESS OR IMPLIED, CONCERNING TREDIT TIRES AND WHEELS OTHER THAN THE EXPRESS WARRANTY CONTAINED IN THIS LIMITED WARRANTY. CONSISTENT WITH THE FOREGOING SENTENCE, TREDIT EXPRESSLY DISCLAIMS THE IMPLIED WARRANTY OF MERCHANTABILITY, THE IMPLIED WARRANTY OF NON-INFRINGEMENT, AND THE IMPLIED WARRANTY OF FITNESS FOR A PARTICULAR PURPOSE.
There is no warranty of any nature made by Tredit to you beyond that contained in this Limited Warranty. No person has authority to enlarge, amend, or modify this Limited Warranty. The dealer, distributor, or retailer who sold you your Tredit tires or wheels or the vehicle on which your Tredit tires or wheels were included is not Tredit’s agent and Tredit is not responsible for any undertaking, representation, or warranty made by any dealer, distributor, retailer, or others that exceeds Tredit’s obligations as expressly set forth within this Limited Warranty.
Some jurisdictions do not allow the implied warranty of merchantability to be disclaimed, so the disclaimer of the implied warranty of merchantability may not apply to you. In jurisdictions where the implied warranty of merchantability may not be disclaimed, Tredit nevertheless limits that implied warranty (unless prohibited by law):
(i) To the duration of this Limited Warranty;
(ii) To Issues existing at the time of delivery of the tire or wheel to the original purchaser that surfaced within the Warranty Period and were brought to Tredit’s attention during the Warranty Period;
(iii) To Issues that were reported in writing to Tredit within 30 days of their discovery; and
(iv) To Issues covered by this Limited Warranty.
Tredit makes no express claims of expected tire wear or Usable Tread Life. Treadwear can be affected by many variables, including, without limitation, driving conditions, load, and tire inflation. Nothing in this Limited Warranty is intended to be a representation that tire failures cannot occur.
Disclaimer of Remedies and Limitation of Liability
The Exclusive Remedy provided in this Limited Warranty is Tredit’s sole obligation under this Limited Warranty, and Tredit has no obligation under this Limited Warranty beyond providing the Exclusive Remedy. PURCHASER, OR ANYONE ELSE WHO IS AN INTENDED USER OR BENEFICIARY OF A TREDIT TIRE OR WHEEL, SHALL NOT BE ENTITLED TO RECOVER FROM TREDIT ANY CONSEQUENTIAL, INCIDENTAL, PUNITIVE, INDIRECT, SPECIAL, OR EXEMPLARY DAMAGES RESULTING FROM ANY DEFECT IN ANY TREDIT TIRE OR WHEEL, INCLUDING BUT NOT LIMITED TO DAMAGES FOR INCONVENIENCE, TOWING COSTS, FUEL AND TRANSPORTATION EXPENSES, MOUNTING AND BALANCING CHARGES, EXPENSES INCURRED IN RETURNING ANY DEFECTIVE PART TO TREDIT, THE COST OF HOTEL ROOMS, LOST WAGES, LOST PROFITS, LOSS OF TIME OR LOSS OF USE, AND DAMAGE TO ANY VEHICLE ON WHICH A TIRE OR WHEEL WITH A DEFECT IS ATTACHED. THIS DAMAGES EXCLUSION IS INDEPENDENT FROM ANY WARRANTY REPAIRS SUCCESSFULLY CURING ANY DEFECT IN THE TIRES AND WHEELS AND SURVIVES ANY FAILURE OF THE ESSENTIAL PURPOSE OF ANY OF THE EXCLUSIVE REMEDIES PROVIDED BY THIS LIMITED WARRANTY. In no event will Tredit’s liability under this Limited Warranty, whether sounding in contract, tort, or statute, exceed Tredit’s current retail list price for a reasonably equivalent wheel. Some states do not allow consequential damages or incidental damages to be excluded, so these exclusions may not apply to you. Purchaser must give Tredit at least three reasonable opportunities to cure any Issue or defect in any tire or wheel.
Legal Rights
This Limited Warranty gives you legal rights, and you may have additional legal rights under applicable federal statutes and regulations or state law. Your legal rights under state law may vary state to state.
Important Safety Warnings and Information
Tredit tire and wheel owners must follow these safety tips to avoid serious accident and injury:
• Tire under-or-over inflation or overloading can cause tire failure. You must adhere to directions in the manufacturer’s owner’s manual, tire placard in the vehicle, or tire pressure indicated on the tire for proper tire pressures.
• Be sure that the tire valve caps are all present and securely attached, as the valve cap is one of the primary seals against air leaks.
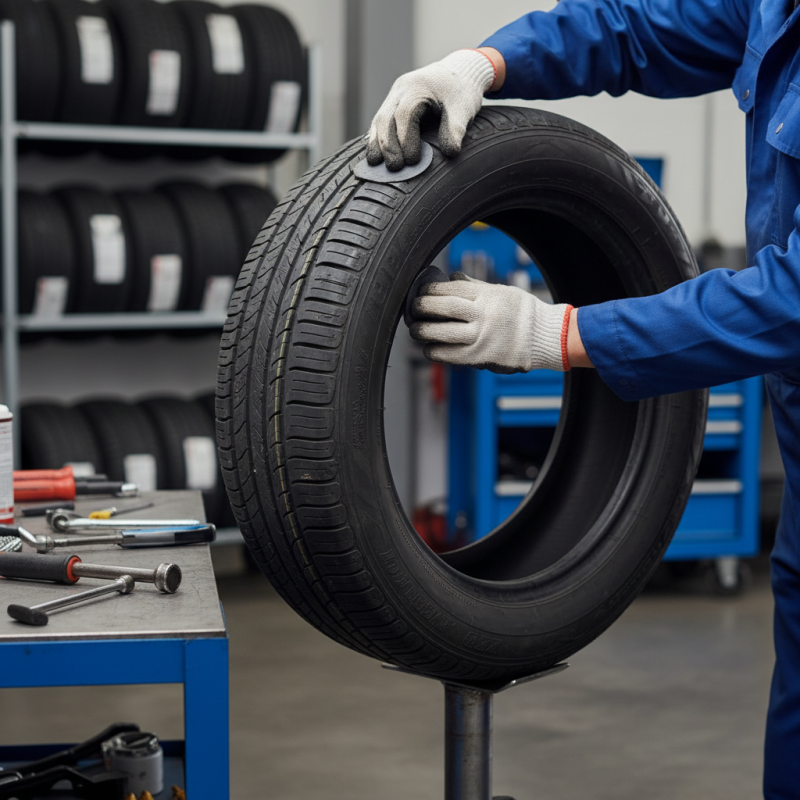
• Tires should be mounted by only specially trained personnel.
• Match the tire diameter and construction with the wheel rim bead seat diameter and style (for example, a tire requiring a 15x6J wheel must only be mounted on a 15x6J wheel).
• Inflation pressure should be checked, using an accurate tire gauge, at least once a month.
• Check pressure when the tire is cool, never bleed hot tires as it may lead to under inflation after cooling, and never allow children to check, inflate, or deflate tires.
• Before towing a trailer, check with your dealer to determine proper tire and wheel sizing and pressures that may be required because of the trailer load.
• Check tires and wheels frequently for cuts, bulges, abnormal or uneven wear, abrasions, glass or metal debris, and impact damage.
• Re-torque wheel nuts after 10, 25, and 50 miles. Check periodically thereafter. Tighten lug nuts in a star pattern using a torque wrench.
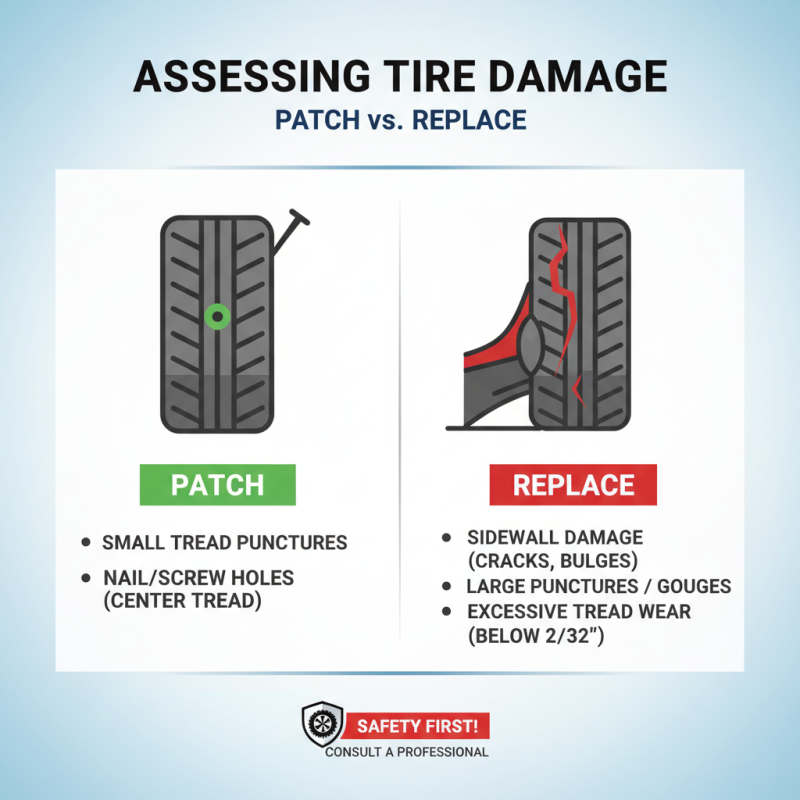
• Repairs to tires must always consist of an U.S. Tire Manufacturers Association-approved plug combined with a patch applied to the inside of the tire when the tire is removed from the wheel; plug repairs only are improper and are prone to leaks and sudden failures.
• Avoid road hazards, debris, curbs, and potholes which can damage your tires, wheels, and alignment.
• Never over inflate your tire and never exceed the maximum pressure and load molded in the tire sidewall.
• Have tire punctures repaired by trained personnel by an authorized Tredit distributor or dealer.
• Best tire performance is achieved when all tires and wheels are of the same type and the size that is recommended by the vehicle manufacturer for the particular axle.
• Never mount radial ply tires on the same axle as non-radial ply tires; never mount radial tires on the front axle when non-radial tires are mounted on the rear axle as these conditions can create vehicle instability resulting in sudden loss of control, damage, and injury.
• It is recommended that all tires on a vehicle be replaced at the same time. However, when only two (2) tires are replaced, the new tires should be installed on the rear axle to achieve better driving performance and safety.
• Never drive on tires that have less than 2/32nds of an inch of tread remaining; replace tires as soon as the tread reaches the treadwear indicators molded into the tread grooves of the tire which reveal when the tread depth remaining is 2/32nds of an inch. Continued use after the tires have less than 2/32nds of an inch of tread creates a serious risk of tire failure, loss of control, and serious injury.
• Never operate your tires at speeds above the DOT speed rating or speeds that are not justified by the road conditions.
How to Contact Tredit
To locate a dealer or distributor near you, or to have any questions answered about this Limited Warranty, please contact Tredit at (855) 887-3348 or online at Tredittire.com.
How to Claim Benefits under this Limited Warranty
To obtain benefits under this Limited Warranty, a purchaser must follow the following step-by-step procedure:
First, you must contact Tredit within the Warranty Period about any Issue you are experiencing with a Tredit tire or wheel in order to take advantage of this Limited Warranty. You can contact Tredit in two different ways:
1.) Go online to the Warranty page of Tredit’s website, https://www.anvautoparts.com/warranty/ and fill out the information requested there to file a warranty claim; or
2.) Call (855) 887-3348 and request the Warranty Department to assist you in making out a warranty claim;
If you are having difficulty making a claim under this Limited Warranty, please contact Tredit at the number above or go to a dealer or distributor where the good was purchased to assist you in making a warranty claim.
Second, you must present the following documents or information to Tredit when you seek the benefits of this Limited Warranty:
• proof of your purchase of the Tredit tire or wheel presented;
• proof of the date of your purchase (if none is presented the date of manufacture will be used for the purposes of this Limited Warranty);
• proof as to the vehicle on which this tire was mounted; and
• if requested, evidence that the vehicle on which the tire or wheel was mounted was properly maintained. To ensure even tread wear for the Useable Tread Life of a Tredit tire, Tredit recommends that tires should be rotated every 5,000 miles or annually, whichever comes first.
When you purchased your Tredit tire or wheel, the dealer presented you with proof of its purchase in the form of a sales receipt, warranty registration form, and this Limited Warranty. That sales receipt also recorded and provides proof of important information that you must present when you seek the benefits of this Limited Warranty. You should retain the purchase receipt because no warranty claim will be accepted by Tredit unless you present evidence of proof of purchase to Tredit.
Lastly, you may need to return the Tredit tire or wheel to Tredit upon Tredit’s request.
Tredit, in its sole discretion, may require you to return the tires and wheels for which you are claiming the benefits of this Limited Warranty as a condition precedent to providing you with warranty benefits. Please follow the instructions below for properly returning tires and wheels covered by this Limited Warranty to Tredit. Failure to follow these instructions could delay or void your warranty claim.
1. Once the Tredit tires or wheels have been replaced, and Tredit requests that you return the replaced tires or wheels, you will need to ship the replaced tires or wheels back in the package(s) which your replacement product was delivered in, with the call tags provided. Please use one shipping Call Tag per package. Once the replaced tires or wheels are ready to be shipped, you will need to drop off the box(es) at the nearest shipping store.
Please do not call for pickup, as shipper may charge you for this service and Tredit Tire does not cover this expense.
2. If there are no call tags in the warranty packet, or if your packet is missing, please call Tredit right away at (855) 887-3348 and ask for the Warranty Department. Please verify with Tredit if you need to send back the replaced tires or wheels before disposing of them. You will be billed for product not returned if disposed without authorization. Also included in this packet is a copy of our Return Goods Authorization (if the replaced tires or wheels are to be returned).
3. Labor receipts and supporting documentation for labor reimbursement must be mailed, emailed, or faxed separately to Tredit Tire and Wheel Company, Warranty Department. 3305 Charlotte Ave. Elkhart IN 46517. Emailed to: sale@anvautoparts.com. Faxed: 800-795-4437. (Do not include your documentation in the boxes with the tires or wheels you are returning under this Limited Warranty.) The customer copy must be included to copies of any labor receipts you have incurred. (If the customer copy is missing in your packet, please make a copy of the packing list and staple it to any labor receipts). Supporting documentation for labor reimbursement and the tires and wheels for which you are claiming the benefits of this Limited Warranty must be received within 60 days of filing your warranty claim. If receipts are not received within 60 days, reimbursement may be denied, and the claim will be closed. If the tires or wheels for which you are seeking benefits under this Limited Warranty are not returned within 60 days, you will be invoiced or your credit card will be charged for all replacement tires and wheels, including shipping and handling.
4. All paperwork must be clearly marked with at least the last six numbers of your VIN/Serial No. Paperwork that is received without the VIN/Serial No. will delay processing and could be denied. Make sure to include a mailing address for reimbursement.
5. As set forth in the Disclaimer of Remedies and Limitation of Liability section of this Warranty above, Tredit will not reimburse you for loss of time, inconvenience, loss of use, towing fees, balancing, telephone calls, cost of meals, lodging, or any other incidental expenses or consequential damages incurred as a result of replacing any Tredit tire or wheel covered by this Limited Warranty.
6. If Tredit determines that the tires and wheels you return are not covered by this Limited Warranty, you will be invoiced or your credit card will be charged for the replacement product(s), including any shipping and handling charges.
It is your obligation to present the tire or wheel for which you are seeking a warranty replacement or a purchase price allowance to an authorized Tredit tire distributor or participating dealer in the USA or Canada, along with proof of your purchase. Until a tire or wheel is accepted by the dealer or distributor for warranty replacement or allowance, the tire or wheel remains the responsibility of the purchaser. If there is a dispute with respect to the application of this warranty, you must make the tire or wheel available for further inspection by Tredit or its representatives at your sole cost. Once the tire or wheel is accepted by the dealer or distributor for replacement or allowance pursuant to this Limited Warranty, you agree to relinquish all ownership and all rights to the tire or wheel.
Dispute Resolution
Any legal disputes relating to this Limited Warranty or any Tredit tire or wheel must be filed in a federal or state court located in St. Joseph County, Indiana, and you agree to the exclusive jurisdiction of those courts over any such disputes. This Limited Warranty is governed by, and must be interpreted and construed in accordance with, the laws of the State of Indiana without regard to Indiana’s conflicts-of-laws principles.
Any action for breach of this Limited Warranty must be commenced not more than 12 months after you discover the breach and not more than (i) 6 years after the date of manufacture for a Tredit tire or (ii) 2 years after the date of manufacture for a Tredit wheel. You must give Tredit reasonable opportunities to cure any breach of this Limited Warranty before bringing any lawsuit for breach of this Limited Warranty.